Brinks Review: Features and Pricing
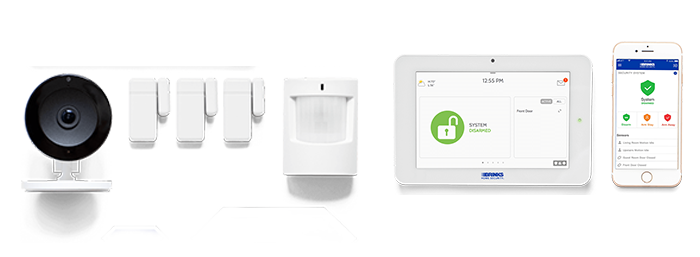
Brinks gives some pre-configured packages and several add-on elements. The Smart Security Essential package costs about $200. It has a six-inch touch-screen control panel, a setup guide, a yard sticker and sign, a couple of window & door sensors, and a motion sensor. The Smart Security Complete package costs about $350. It comes with a motion sensor, the panel, manuals, stickers, a yard sign, the Skybell video doorbell camera, and a couple of window & door sensors. The complete package, The Smart Security Ultimate, will cost about $700 and comes with free professional installation, manuals, stickers, yard signs, a Skybell video doorbell camera, an outdoor camera, several window & door sensors, and a motion sensor.
To utilize the Brinks system, the user has to commit to a lengthy three-year pro round-the-clock monitoring, which differs in price depending on what system you want. The monitoring for the essential system costs about $40 per month, while monitoring for the Complete system goes to $45. The Ultimate system costs about $50 per month. In comparison, the interactive monitoring plan of SimpliSafe goes for $25 per month, and Wyze costs only $5 per month for the monitoring service, and neither needs a contract commitment. Also, both SimpliSafe and Wyze will continue to function if you suspend or cancel monitoring. Still, if you cancel your monitoring subscription here, the mobile app will no longer function. You will have no emergency response features and only restricted control of the home automation components through the panel.
The control panel is Android-based and has a six-inch capacitive touch screen. It can be placed on a wall or located on a flat surface using the desktop stand that is already included. Inside, you will get cellular, dual-band Wi-Fi, Z-Wave, and Bluetooth radios, as well as an RF radio that communicates with the sensors, a siren, and a backup battery that gives up to a day of power in the event of any power loss. The exterior has a front-facing camera that will get the images when an alarm is triggered or when anyone tries to access the control panel. It also contains a couple of stereo speakers and microphones for audio conversations with the monitoring center, a power button, and a microSD card slot. A power cord is also hardwired to the terminal on the back of the control panel. The system can be controlled by utilizing a web console, a mobile app, or the touch-screen panel.
The panel's home screen gives the current weather conditions, time, and date. There are big colorful icons that inform you about the system status, such as disarmed, armed away, and armed stay. Armed stay enables the window and door sensors but not the motion sensor. The armed away enables all the sensors. You can tap the weather icon to get a forecast of your area for the coming days. An activity window on the right portion of the screen informs you if any sensor has been triggered and its present status. The panel also emits a voice alert that tells you if any window or door sensor has been triggered. If there are any alarms, alerts, or messages, a red dot will come in the top right corner of the display. Tap the dot to open another screen to see an activity history with all the event details.
Here, they can see the video tutorials. At the bottom half of the screen is a panic button. You can tap it to open a menu where the fire departments or the police can get the alarms. An auxiliary button also connects the user to the Brinks emergency response center. To adjust the screen brightness and speaker volume and access the language settings, photo frame settings, and system settings, you have to swipe down from the top half of the home screen. The system settings include Advanced Settings, Automation, Device Status, Temperature, SD Card, and Display. You have to enter a user code to get to the Advanced Settings menu. Here, you can run the system tests, add Bluetooth devices, configure the panel sounds, reboot the panel, modify the Wi-Fi settings, add devices, and run system tests.